Easily Relocate Your Green Sanctuary with These 3 Simple Gardening Tips
Moving your beloved garden doesn't have to feel overwhelming. Whether you're shifting across town or simply redesigning your backyard, learning to easily relocate your green sanctuary can help preserve all your hard work and keep your plants thriving. In this informative and comprehensive article, you'll discover how to successfully transition your garden with three simple gardening tips. Apply these expert strategies to ensure your cherished plants adapt swiftly and maintain their health through every season.

Why Relocating Your Green Oasis Is Sometimes Necessary
Your garden is more than a collection of plants--it's a living sanctuary that brings serenity and beauty to your life. There are many reasons you might consider relocating your garden sanctuary:
- Moving to a new home: Don't want to leave behind favorite perennials or sentimental blooms? Taking them along ensures your new space feels just like home.
- Renovating your property: Construction, landscaping, or home improvement projects may require plants to be moved temporarily or permanently.
- Creating optimal growing conditions: Changes in sunlight, soil quality, or drainage may necessitate a shift for healthier, more resilient plants.
Relocating your green retreat isn't just possible--it's easier than you think. These three simple gardening tips will empower you to move your plants with confidence.
Tip #1: Plan Ahead for a Smooth Transition
The foundation of successfully moving your green space is careful planning. By preparing thoroughly, you minimize shock to your plants and streamline the process for maximum efficiency and survival rates.
Assess Your Current and Future Gardens
- Make a Plant Inventory: List all the plants you wish to move, noting their species, sizes, and seasonal needs. This helps you decide what's worth transplanting and what might do better staying behind.
- Evaluate Your New Location: Check soil type, sun exposure, drainage patterns, and available space at your new garden. Matching plants to optimal spots ensures continued vigor.
- Time Your Move Wisely: Relocate your sanctuary during early spring or late fall when most plants are dormant or less stressed. Avoid moving during blooming peaks or hot, dry spells to reduce transplant shock.
Gather Necessary Tools and Materials
- Spade or garden fork: For efficient digging and minimizing root disturbance.
- Tarp or garden bags: To catch and carry soil and plant material.
- Watering cans and mulch: For hydrating roots and reducing shock after relocation.
- Labels or markers: Helping you keep track of what you've moved and where it's going.
Planning and preparation are the cornerstones of successfully establishing your green haven in a new location.
Tip #2: Uproot, Transport, and Replant with Care
Taking the right steps when physically moving your plants is critical for their survival. These guidelines ensure you can relocate your green refuge smoothly and safely.
How to Uproot Your Plants the Right Way
- Water in Advance: Water your garden thoroughly the day before moving. Moist soil helps roots stay intact and reduces transplantation stress.
- Dig Wide and Deep: Start digging several inches away from the stem, working around the root ball. Lift the plant from below to preserve as many roots as possible.
- Protect the Roots: Wrap roots in moist burlap, newspaper, or place in a shaded container or bag. Never let the roots dry out during transport.
Transporting and Temporary Care
- Shade and Moisture: Keep uprooted plants out of direct sun and wind, and maintain root moisture. Spritz with water if needed during transit.
- Prompt Replanting: Try to replant within a few hours. If that's not possible, temporarily "heel in" plants by covering roots with moist soil in a shaded area.
Perfecting the Replanting Process
- Prepare Holes: Dig wide, shallow holes that offer enough space for the root system. Amend soil if necessary based on your plant's needs.
- Replant at the Right Depth: Position each plant at the same soil level as before. Firm soil gently around the root ball to eliminate air pockets.
- Water Generously: Give each new transplant a thorough soak. Apply mulch to conserve moisture and suppress weeds.
- Label Each Plant: Use garden tags so you can monitor how each species adapts in its new spot.
Note: Some plants, such as annuals and shallow-rooted perennials, are easier to move. Older trees and large shrubs might require professional help or specialized equipment for successful relocation.
Tip #3: Support Stress-Free Recovery and Long-Term Growth
The key to building a thriving garden sanctuary after a move is aftercare. With proper attention, your relocated plants can establish quickly and flourish in their new home.
Monitor Closely in the First Weeks
- Consistent Moisture: Water transplanted plants regularly but avoid waterlogging. Check soil every day during the first two weeks and adjust as needed.
- Shade and Shelter: Shield delicate or sun-sensitive plants with temporary shade cloth or garden fabric to prevent leaf scorch.
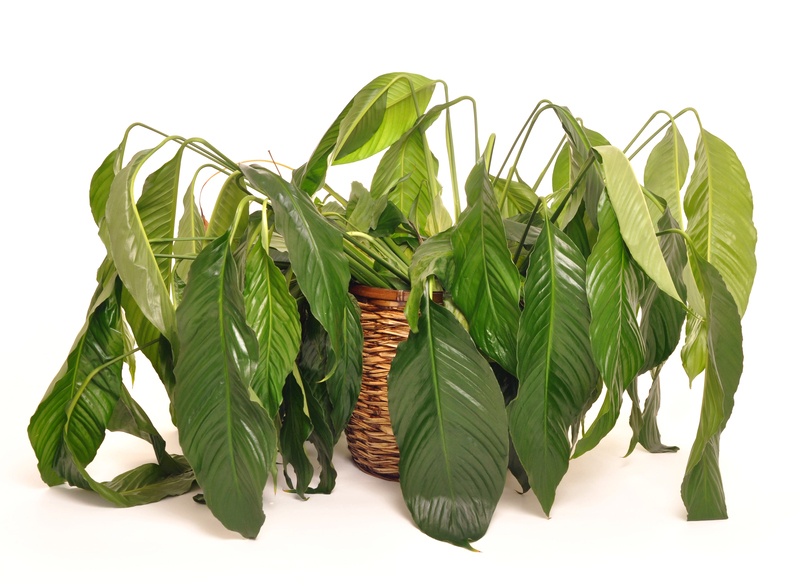
- Inspect for Signs of Stress: Look out for drooping, yellowing, or scorched leaves. Prune away any damaged foliage, but don't over-prune as plants need foliage for recovery.
Encourage Root Growth and Health
- Root Stimulators: Consider using natural rooting hormones or diluted kelp solutions to aid establishment.
- No Fertilizers Initially: Avoid adding fertilizer for the first month, as stressed roots may burn. Wait until new growth appears.
- Mulch Generously: Maintain a 2-3 inch layer of organic mulch around the base of each plant--keeping it away from direct contact with stems or trunks. Mulch aids moisture retention and temperature regulation.
Maintenance and Care for Your New Garden Sanctuary
- Weed Regularly: Keep competition low so transplants can focus on healthy root development.
- Loosen Soil Gently: Lightly cultivate surrounding soil to improve airflow and water penetration, but be careful near young roots.
- Review Placement: Over the coming months, monitor sun patterns, drainage, and plant health, making small adjustments as needed for optimum growth.
- Celebrate Progress: Take photos, journal your plant's responses, and enjoy watching your relocated garden sanctuary grow stronger every day.
Bonus Tips: Making the Move Even Easier
Sometimes, a few extra tricks can transform a stressful process into an exciting new beginning for your garden haven. Take advantage of these additional ideas:
- Take Cuttings: For larger plants or those difficult to transport, propagate new plants by taking cuttings before your move.
- Divide and Conquer: Early spring and fall are ideal for dividing oversized perennials--making relocations lighter and renewing plant vigor.
- Repot Container Gardens: Potted plants are easiest to move. Refresh soil and trim roots before the transition to encourage healthy regrowth.
- Label Everything: Use waterproof labels, especially if relocating during dormancy when plants may be unrecognizable out of leaf or bloom.
- Enlist Help: Don't hesitate to ask friends, family, or local gardeners for assistance--especially for larger trees or bulk dig-ups.

FAQs: Relocating Your Green Sanctuary
What plants are easiest to relocate?
Young perennials, herbs, most annuals, and small shrubs typically adapt quickly to a new space. Trees, mature shrubs, and plants with extensive root systems need more preparation and care.
What's the best time to relocate a garden?
Early spring and late fall are ideal because plants are dormant or less actively growing. Avoid moving plants during an active growth period or extreme heat for best results.
How can I minimize shock during the move?
Keep roots moist at all times, replant quickly, provide temporary shade, water regularly, and refrain from fertilizing until roots become reestablished. Using mulch and root stimulators can further ease the transition.
Should I relocate all my plants?
It's best to take healthy, favorite, or rare plants. Some annuals or common species may be easier to replace or reseed in the new location. Make choices based on both practicality and sentimental value.
Conclusion: Begin a Fresh Chapter for Your Garden Sanctuary
With thoughtful planning, careful handling, and attentive aftercare, relocating your green sanctuary becomes a manageable and even rewarding project. Whether you're moving across town or recreating your backyard haven, these three simple gardening tips--planning ahead, gentle transplantation, and mindful aftercare--will help your garden flourish in its new home.
Embrace the journey, and soon, your revived green sanctuary will blossom with new life, beauty, and tranquility wherever you plant your roots.
Ready to start? Take these tips to heart and nurture your relocated garden back to its vibrant best!